Conducting a Survey
Creating and Setting Quotas
Quotas are a necessary condition for conducting surveys on Android devices.
To create a quota on the main page of the survey list, click “Quotas”.

Next, click "Add Group". In the pop-up window, enter a name (visible to administrators only) or leave the default name “Group 1”. Choose “Tablet” as the survey type. After creation, the new quota group will appear in the list.
Next, click on the quota settings icon: 
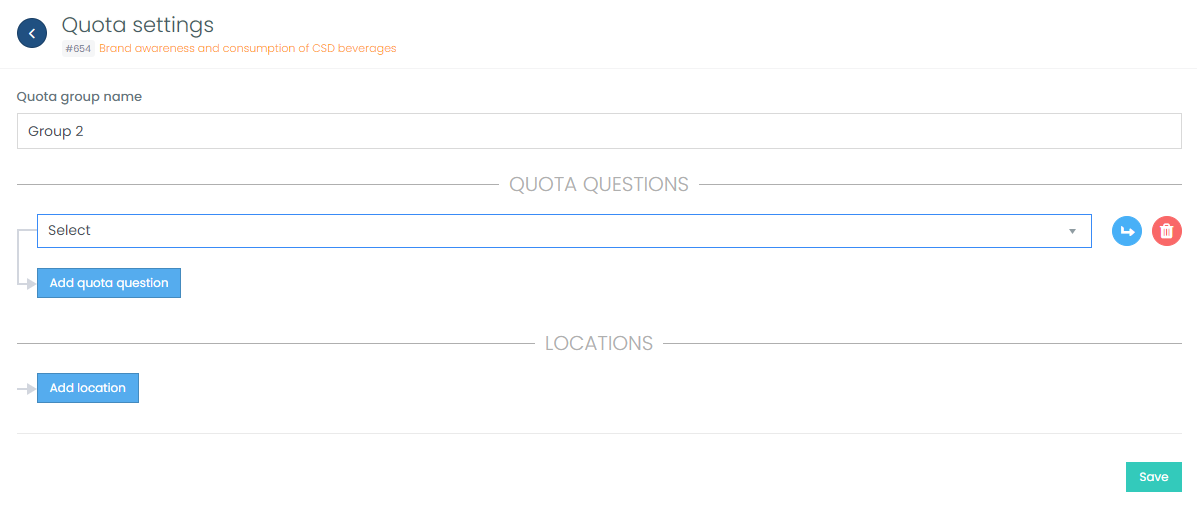
A quota consists of quota questions and locations.
Quota questions are questions whose answer options are used in the quota.
For example:
Gender: 1) Male, 2) Female
Age: 1) Under 18, 2) 18-29, 3) 30-44, 4) 45-60, 5) 60+
A quota question can only be a choice question with the selection type “Single”.
The system allows building interlocking (nested) and non-interlocking (parallel) quotas.
Quota questions can be “nested” within each other - this way, a interlocking quota can be built. For example, the question “Respondent's age” can be nested within the question “Respondent's gender”. To create parallel (non-interlocking quotas), questions are placed at the same level.
Select quota questions. To create a level of nesting, click on  .
.
To place a question at the same level,
click “Add Quota Question”.
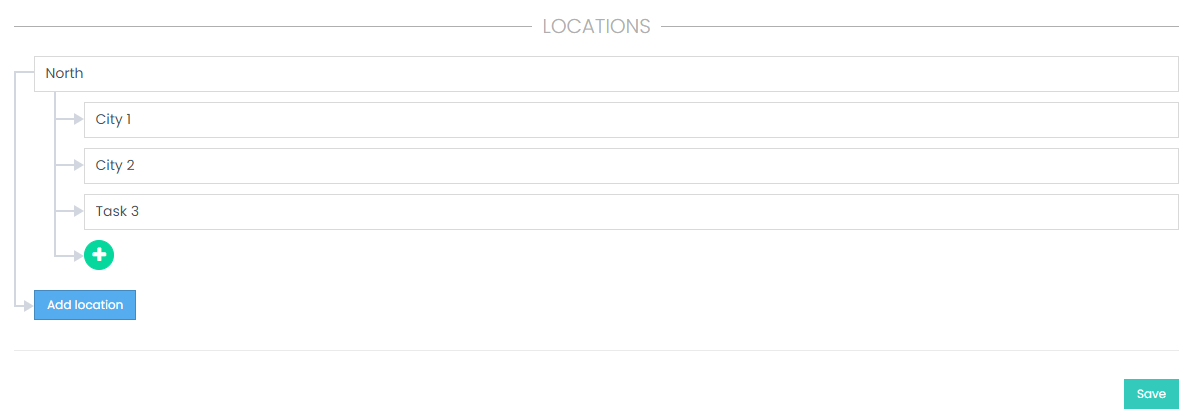
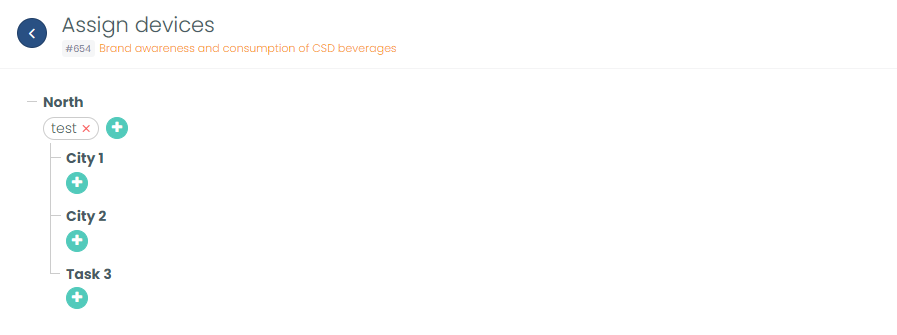
Locations are the places where interviews are conducted and/or tasks for the interviewer. Locations support any level of nesting. This allows for convenient structuring of the table, easily attaching supervisors, controllers, and devices.
For example: North -> Region 1 -> City 1 -> Street 1 -> Task 1.
Enter the names of locations and/or tasks. To create a level of nesting, click on . To place a location at the same
level, click “Add Location”.
Click “Save”.
Click “Distribution” to set the target values for the quota.
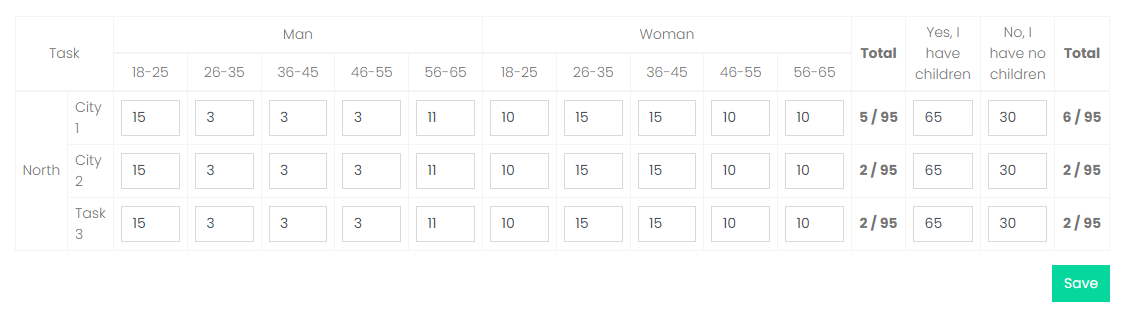
Enter the target values.
Enter 0 or leave the cell empty for cells where completion is not required. If a screener is set for an answer option of a quota question, specify a target value of 0. For parallel (non-interlocking) quotas, ensure that their cumulative values for each task are equal.
Click “Save”.
If a quota is not required in your survey, you can create a question with a single answer option, use this question in the quota, and in the question settings, check the Autoskip box (the question will not be shown to users).
After saving the quota group settings, quota questions cannot be changed. If you make a mistake, delete the current group and create a new quota group. Locations cannot be deleted but can be added or renamed.
Quota Overflow
A quota can be exceeded (more questionnaires completed than required by the quota) for web surveys (online) and surveys on the Android app (offline) for various reasons. See descriptions in the sections below.
Offline Surveys (Tablets)
Quota overflow for surveys on devices (offline) can occur in the following situation:
- A single task is assigned to two or more devices
- A device synchronizes before another device from the same task has uploaded questionnaires to the server
- Together, both devices complete more questionnaires than required by the quota
- The questionnaires from the device will be marked as “Out of quota” if the quota is closed by the questionnaire from another device
It is recommended to avoid quota overflow by assigning personal tasks. Otherwise, it is necessary to synchronize as often as possible so that devices receive information on how much of the quota has been closed by other devices.
Web Surveys (Online)
For online surveys, quota overflow is possible only if respondents are allowed to complete the survey after passing the quota questions and at that moment the quota was "opened". In such cases, if two respondents take the survey simultaneously, the quota will be counted for the one who finishes first. The second respondent's survey will be marked as “Out of quota”.
Creating and Assigning Devices
To create a device, click on "Device Accounts" in the top menu. If the "Device Accounts" menu item is missing, check if the current user has the "Edit accounts" permission.
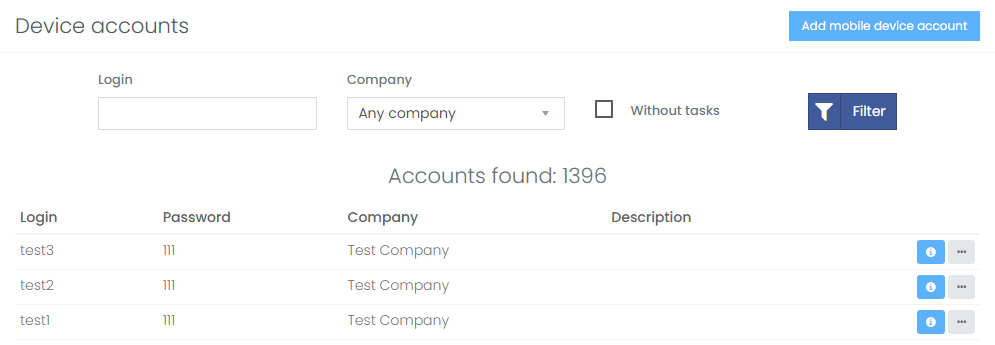
Click "Add Device".
Enter "Login" (can contain only numbers and letters from "a" to "z"), enter a password, entering a description is optional. Click "Save".
If you want to change the "Password" or "Description", click "Edit" in the dropdown menu in the device list. The login cannot be changed.
When clicking on  in the device list, you will see the following information about the device if the device was authorized:
the brand and model of the device, OS version, Gmail account, date of the last synchronization, date of the last login, and the location of the last submitted survey.
in the device list, you will see the following information about the device if the device was authorized:
the brand and model of the device, OS version, Gmail account, date of the last synchronization, date of the last login, and the location of the last submitted survey.
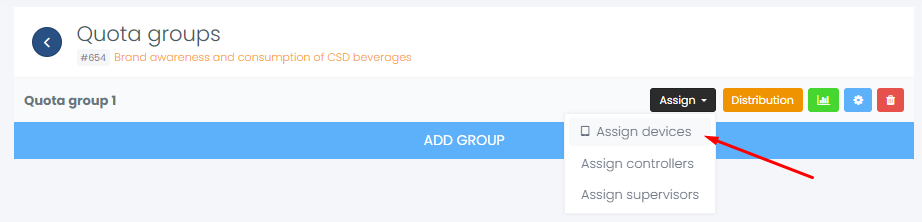
To link a device, go to the survey list (click "Surveys" in the top menu). Then click "Quotas". In the quota groups list, click "Link"->"Devices".
Click  ("Add Account") on the location or level to which you want to link the device account.
If the device is linked at the top level, all sub-locations of that level will be accessible to it.
("Add Account") on the location or level to which you want to link the device account.
If the device is linked at the top level, all sub-locations of that level will be accessible to it.
After that, you can log in on an Android device. To do this, download the application "FlowSurvey" from Play Market. Open the application and enter the login and password that you specified when adding the device account. After that, the survey should appear in the application. If there is no survey, check if the survey is enabled.
If you forget the login and password, you can view them by clicking "Edit" on the "Device Accounts" page.
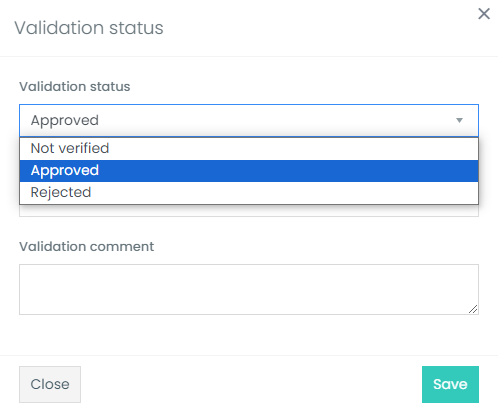
Questionnaire Validation Status
Questionnaire validation involves setting a validation status after reviewing the questionnaire. The following statuses are available: Not Reviewed, Approved, and Rejected. It is possible to add a review comment when specifying the status.
Both regular users and controllers (see the section "Creating and Assigning Controllers") can perform questionnaire validation.
To set a validation status, go to the questionnaire page and click next to the control status. The status can also be set for any question within the questionnaire.
If the status "Rejected" is set, the questionnaire is marked as "Out of Quota" and disappears from the completed tasks on the interviewer's device. In the questionnaire list, the questionnaire will be highlighted with a red background.
Creating and Assigning Controllers
Controllers are users who have access to one or more locations of the project. They can see the surveys for these locations and, if given the permission "Survey Validation," can perform survey checks.
To create a controller, click on "Settings" -> "Controllers" in the top menu.
Click "Add Controller". Enter the "name", "login", and "password". "Description" is not mandatory. Click "Save".
To assign a controller, go to the survey list page ("Surveys" in the top menu). Click on "Quotas" for the desired survey. If a quota has not been created, create and configure the quota (see "Creating and Setting Quotas"). A controller cannot be assigned without a quota.
Click on "Assign" -> "Controllers".
A controller can be assigned at any level of the location tree. If assigned at a higher level, all nested sub-levels
and locations will be accessible to them. To assign, click on  and select the
controller from the list. The controller will not be listed if they are assigned at a higher level and this location
is automatically accessible to them. Click "Add".
and select the
controller from the list. The controller will not be listed if they are assigned at a higher level and this location
is automatically accessible to them. Click "Add".
To ensure that the controller can see the project and view its surveys, log in under their account. To do this, go to
the "Settings" -> "Controllers" page and click on  .
.
List of Questionnaires
To view the list of questionnaires, go to the list of surveys and click "Data" -> "Responses".
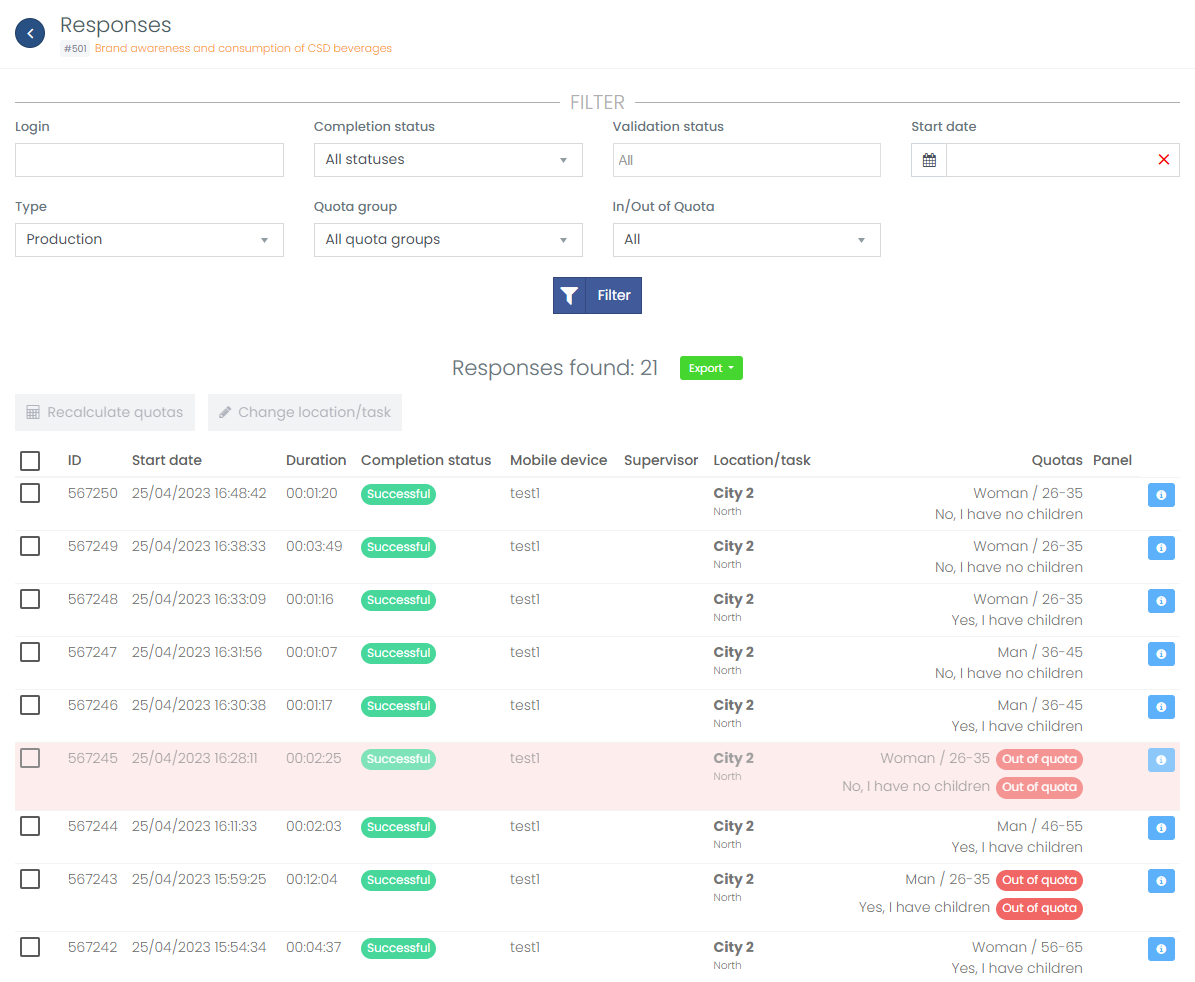
Supervisors and controllers will only see the questionnaires of the locations they have access to. A standard user will see all the questionnaires for the project.
The following filters are available for filtering questionnaires:
- Login. The device account login. Only one login can be entered.
- Completion status - the completion status of the questionnaire:
- Successful. A questionnaire can have this status if all questions have been answered to the end, the questionnaire has passed quotas and screenings. In the case of quota overflow (see the Quotas section), the questionnaire also has a successful status but is marked with the "Out of Quota" marker.
- Screened out/Quota full. When passing a quota or screening question, if the questionnaire does not fall into the quota or triggers a screening condition, the questionnaire is interrupted and marked with this status.
- Interrupted/In progress. This status combines questionnaires sent from a tablet (interrupted) and online questionnaires that may be in progress. The difference between an online questionnaire and a device questionnaire for this status is that a questionnaire sent from a device has a completion date, whereas an online questionnaire does not.
- Type:
- Production. Questionnaires sent from devices or online questionnaires completed through a production link.
- Test. Only online questionnaires launched in test mode (test link or "Test" button in the survey editor). Test questionnaires on a device are not saved and not sent to the server.
- Date (start). A questionnaire has two dates: the start date of completion and the end date of completion. This filter uses the start date of the questionnaire.
- Quota Filter. Available only with the "Data / View Quotas" permission
To filter by quota, select the following filters: - Quota group to which the device's location or the relevant online quota belongs.
- Task (or location). Any level of location hierarchy can be selected. This filter is available only for "Device" type quotas. It's optional and can be left as "All" if not needed.
- Quota. If a quota contains nested questions (e.g., "gender" nested in "age"), both the upper level "Gender" (e.g., "Male" regardless of age) and the lower level "Gender" -> "Age" (e.g., "Female" + "from 25 to 30") are available for selection.
- Out of Quota. Available only with the "Data / View Quotas" permission.
A questionnaire that is not listed in the quota table. A questionnaire can be "Out of Quota" for several reasons: - Quota overflow (see "Quota Overflow" section)
- The questionnaire was rejected by a controller (see "Questionnaire Control and Validation" section)
By default, the filter is set to display "Production" questionnaires.
Description of columns in the questionnaire list table:
- Checkbox. Select the action to be performed with the questionnaire.
- ID - Unique questionnaire code
- Start - The start date of the interview.
- Duration - End date of the interview minus the start date of the interview.
- Status - Completion status of the questionnaire
- Account. The account (login) of the device
- Supervisor. The supervisor - owner of the device account
- Task. The task or location.
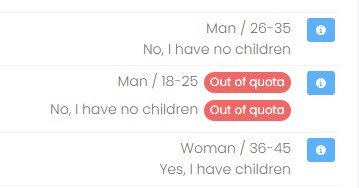
- Quotas. The quotas that this questionnaire closes. If the questionnaire is "Out of Quota," it will be marked with a red "Out of Quota" label (for more details, see the "Quota Overflow" section).
If a questionnaire row has a red background, it means that the questionnaire was rejected by a controller.
To view questionnaire details, click on the button 
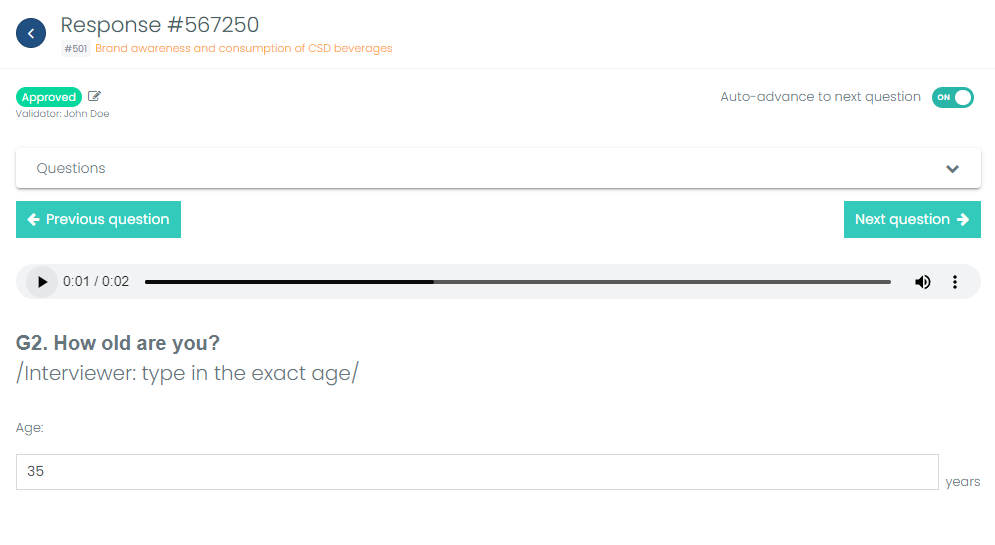
Questionnaire
This page provides detailed information about the questionnaire, including the coordinates for the start and end of the survey, determined by the device via GPS or another method.
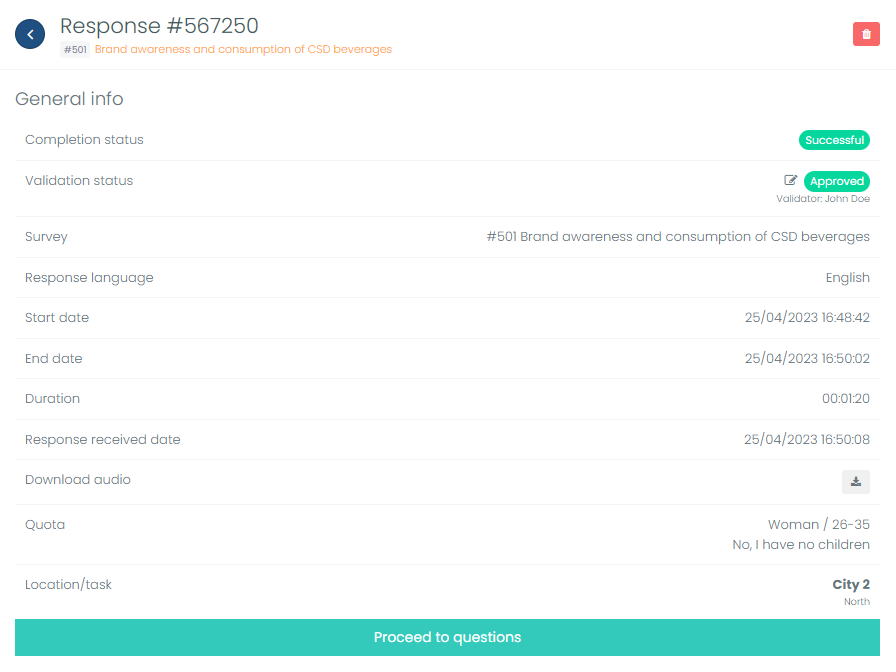
To view responses to questions, click the “To Questions” button. You will be taken directly to the first answered question in this questionnaire.
On the response page, you can listen to audio for each question separately. If the interviewer returned to the question multiple times, the audio would be “merged,” and the recording of their return will be at the end of the audio.
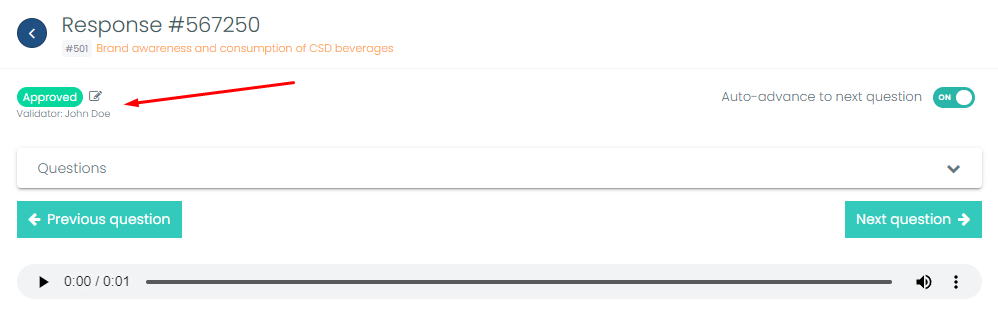
The “Auto-advance to the next question” feature allows for automatic playback of audio and moves to the next question once the audio finishes. If the audio is shorter than 5 seconds or absent, the auto-advance will occur after 3 seconds. If you wish to stay on the current question, turn off the “Auto-advance” toggle.
This page allows for setting the validation status. To do this, click next to the questionnaire's current status “Not checked”.
Use the “Next Question”, “Previous Question” buttons, or the dropdown list of questions to navigate between questions, where you can jump to any question in the questionnaire.
Editing the questionnaire is also available on this page. To change the response to a question, hover over the response area, and the “Edit” button should appear. Available only with the permission ”Data / Edit Questionnaires”.
Then select a different answer option and click save. If the question is quota-related, the quota will be recalculated.
Interview Audio Recording
For surveys conducted on devices in the mobile app Lemur Survey, background audio recording is always enabled and is a necessary requirement to start the survey on the device.
Background recording is essential for quality control of the interview process.
At the moment of sending the questionnaire from the device to the server, the audio is also sent.
Audio for each question is recorded separately.
After receiving the questionnaires on the server, the audio can be listened to separately for each question in the questionnaire (see the section "List of Questionnaires"). Available only with the "Data / Audio Listening" permission.
Alternatively, the audio can be exported in mp3 format, where each mp3 file will correspond to a question. Available only with the "Data / Audio Export" permission.
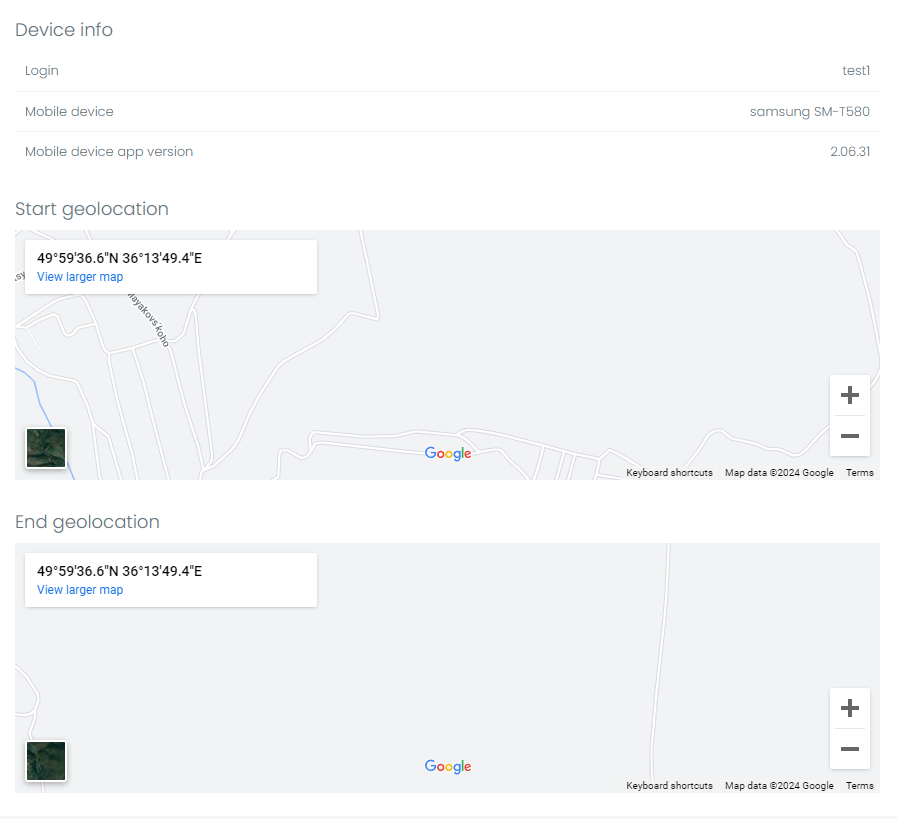
GPS Coordinates Fixation
Device location coordinates are recorded at the start and end of the survey. Coordinates are determined by the device's GPS or other methods.
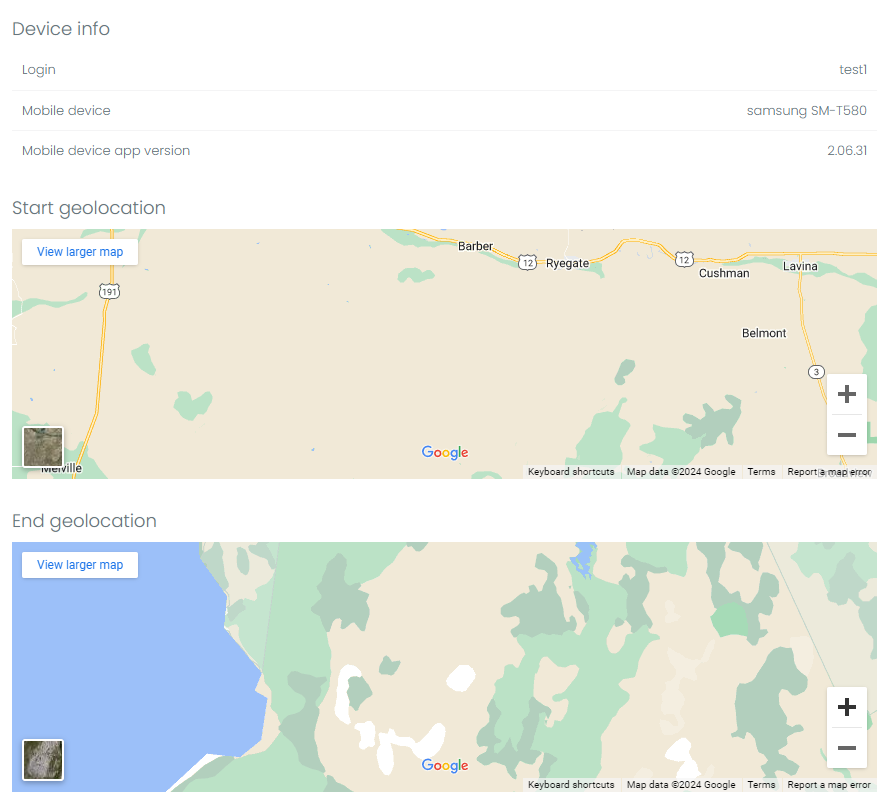
Access to location data is a necessary condition for starting a survey on the device.
Coordinates can be viewed in the questionnaire (see the section "List of Questionnaires") or downloaded in Excel\SPSS format (see the section "Exporting Data to Excel/SPSS").
Coordinates are a supplementary control measure and do not guarantee 100% accuracy.
For Android devices, it is possible to "falsify" location data.